
Your shopping cart is empty!
Application Instructions
How To Apply Press Ons Like a Pro
( In 7 Simple Steps)
Step 1: Wash your hand thoroughly and push back the cuticles. ( you can use a standard wood
cuticle stick or a cuticle pusher)
Step 2: Swipe the nails with alcohol or a nail dehydrator.
(This step isn’t mandatory but will help your press-ons last longer)
Step 3: File and shape your natural nails.
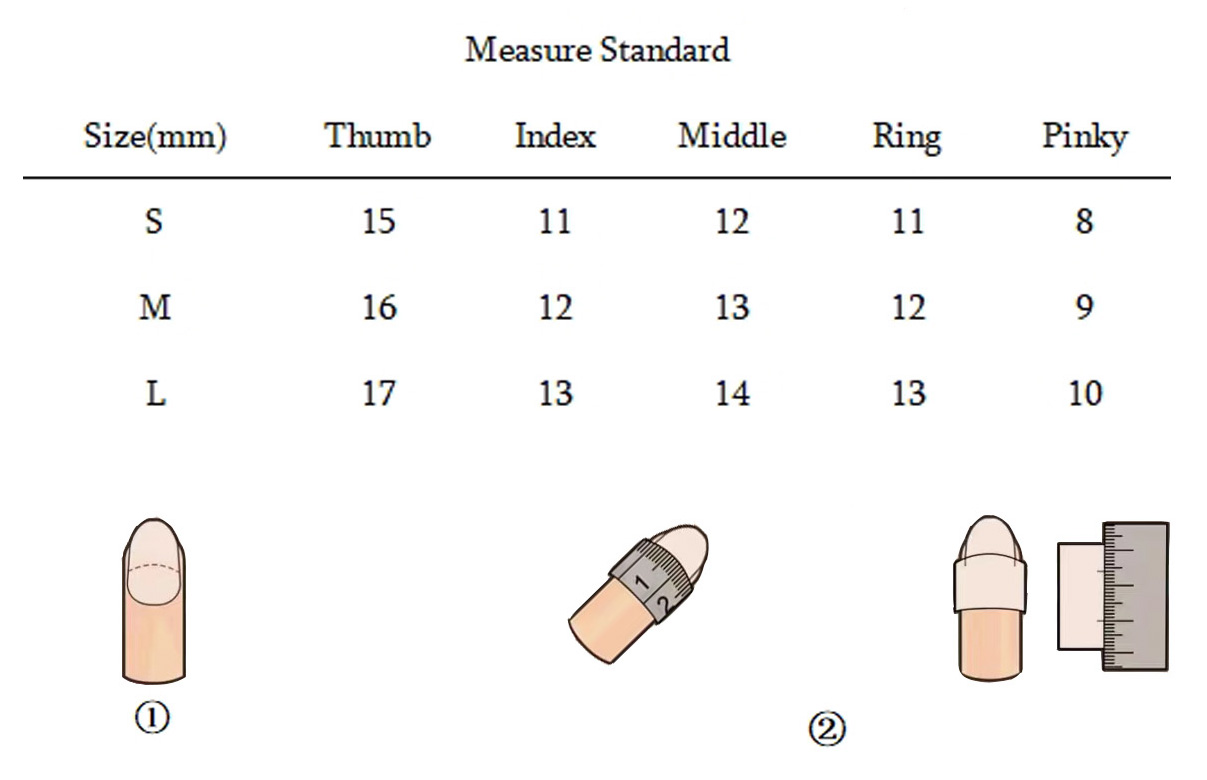
Step 4: Match your nail size with the press-on.
Step 5: Apply a small drop of glue on your natural nail and on the press-on nail.
( This will help ensure your press-ons last 1-2 weeks. If you don’t want them to last that long use less glue.)
Step 6: Press and hold for 30-60 seconds to secure it in place.
Step 7: Wash hands and apply hand cream.
If you follow these steps your press-on nails will last at least a week or longer.
How To Remove Press Ons
( In 5 Simple Steps)
Here’s a concise version of the step-by-step guide on how to remove press-on nails:
Step 1: Gently file the surface of each press-on nail to break the seal.
Step 2: Soak your fingertips in acetone or place acetone-soaked cotton balls/pads on top of each nail, ensuring they are fully covered.
Wait for 10-15 minutes to allow the press-on nails to soften in the acetone.
Step 3: Wiggle and lift each press-on nail starting from the sides. If they don’t come off easily,
continue soaking for a few more minutes.
Step 4: Use a wooden cuticle stick to scrape off any remaining adhesive on your natural nails.
Step 5: Wash your hands to remove any acetone residue and apply cuticle oil or hand cream for moisture.
Follow these steps and you won’t have any problem in removing your press ons, remember to be gentle to avoid nail damage.

Powered By OpenCart
T2N | Faux Ongles en ligne | Press on Nails Store © 2024